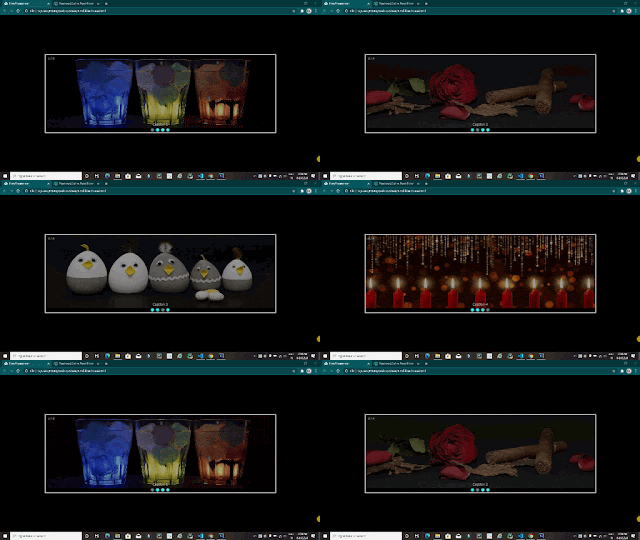
How to create Image Slider using HTML and CSS | Complete Source code

Hello friends how are you , Today in this post "How to create Image Slider using HTML and CSS" i am going to teach you how you can create an image slider using HTML and CSS with few lines of JavaScript code. If you want to create a website then you can use this slider into your project to make your website very attractive. If you wan to create something interesting using simple HTML and CSS then this post is for you. 

If you want to understand this through video then watch this video i have explained it step by step live

Now i am going to explain step by step.

Step 1:Create a Folder: Just  create a folder with any name and in any drive in your system, In my case my folder name is ImageSlider.

Step 2:Create an HTML file: Now open notepad and type the below code or you can copy this code for your personal use

<html>
    <head>
        <title>KrazyProgrammer</title>
        <style>
            body{
                background-color: black;
                font-family: Arial, Helvetica, sans-serif;
            }
            .mySlides
            {
                display: none;
            }
            img
            {
                vertical-align: middle;
            }
            .container
            {
                position: absolute;
                margin: auto;
                top: 50%;
                left: 50%;
                transform: translate(-50%,-50%);
                border: 5px groove lightgray;
                box-shadow: 1px 1px 20px cyan;
            }
            .text
            {
                color:white;
                font-size: 16px;
                padding: 20px 0px;
                position: absolute;
                bottom: 8px;
                width: 100%;
                text-align: center;
            }
            .numberText
            {
                color: white;
                font-size: 13px;
                padding: 8px 12px;
                position: absolute;
                top: 0;
            }
            .dot
            {
                height: 15px;
                width: 15px;
                margin:0 2px;
                background-color: cyan;
                border-radius: 125px;
                display: inline-block;
                transition: background-color 0.6s ease;
            }
            .active
            {
                background-color: orangered;
            }
            .fade
            {
                -webkit-animation-name: fade;
                -webkit-animation-duration: 1.5s;
                animation-name: fade;
                animation-duration: 1.5s;
            }

            @-webkit-keyframes fade{
                from
                {
                    opacity: 0.4;
                }
                to
                {
                    opacity: 1;
                }
            }
            @keyframes fade{
                from
                {
                    opacity: 0.4;
                }
                to
                {
                    opacity: 1;
                }
            }

        </style>
    </head>
    <body>
        <div class="container">
           <div class="mySlides fade">
            <div class="numberText">1/4</div>
            <img src="image/banner1.jpg" style="width: 1100px;height: 350px;">
            <div class="text">Caption 1</div>
           </div>
           <div class="mySlides fade">
            <div class="numberText">2/4</div>
            <img src="image/banner2.jpg" style="width: 1100px;height: 350px;">
            <div class="text">Caption 2</div>
           </div>
           <div class="mySlides fade">
            <div class="numberText">3/4</div>
            <img src="image/banner3.jpg" style="width: 1100px;height: 350px;">
            <div class="text">Caption 3</div>
           </div>
           <div class="mySlides fade">
            <div class="numberText">4/4</div>
            <img src="image/banner4.jpg" style="width: 1100px;height: 350px;">
            <div class="text">Caption 4</div>
           </div>
           <div style="text-align: center;">
            <span class="dot"></span>
            <span class="dot"></span>
            <span class="dot"></span>
            <span class="dot"></span>
           </div>
        </div>
        <script>
          var slideIndex=0;
          showSlides();
          function showSlides()
          {
            var i;
            var slides=document.getElementsByClassName("mySlides");
            var dots=document.getElementsByClassName("dot")
            for(i=0;i<slides.length;i++)
            {
                slides[i].style.display="none";
            }
            slideIndex++;
            if(slideIndex>slides.length)
            {
                slideIndex=1
            }
            for(i=0;i<dots.length;i++)
            {
                dots[i].className=dots[i].className.replace(" active","");
            }
            slides[slideIndex-1].style.display="block";
            dots[slideIndex-1].className+=" active";
            setTimeout(showSlides,2000);
          }
            </script>
    </body>
</html>

Now save this file with name slide.html inside the created folder [ImageSlider]. Note:Don't forget to type .html after the file name because .html is the extension for HTML file.

Step 3:Download and store images: I have used four images to make this image slider and i have downloaded all the images from pixabay.com. If you want to use the same images then  click here to download images. After downloading the images create an another folder with name image inside the folder ImageSlider and then store all the images inside the image folder. If you have any doubt then watch the above video i have explained everything live.

After doing these your created folder will look like below.

How to create Image Slider using HTML and CSS

and  image folder will look like the below screenshot
How to create Image Slider using HTML and CSS

Note: Image name should be banner1.jpg, banner2.jpg, banner3.jpg and banner4.jpg and for better look image size should be of resolution 1200x400.

Step 4:Run HTML file: Now its time to run HTML file so right click on slide.html file and then select open with and then select chrome browser or you can select any browser for output. 

How to create Image Slider using HTML and CSS

You will get output screen like below GIF image. For Live Practical  click here to watch video


I hope now you can  create "How to create Image Slider using HTML and CSS". If you have any doubt regarding this post  or you want something more in this post then let me know by comment below i will work on it definitely.
 

Request:-If you found this post helpful then let me know by your comment and share it with your friend. 
 
If you want to ask a question or want to suggest then type your question or suggestion in comment box so that we could do something new for you all. 

If you have not subscribed my website then please subscribe my website. Try to learn something new and teach something new to other. 

If you like my post then share it with your friends. Thanks😊Happy Coding.

Post a Comment

0 Comments